Using Cammy - The Official Guide
After starting Cammy, you'll see the main
dialog:
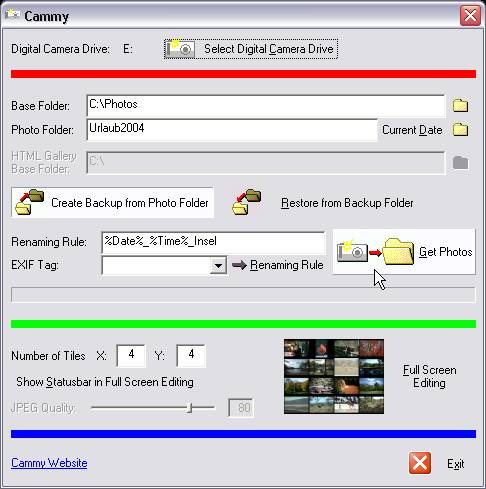
1. Plug in your camera, so that your Windows operating system detects it and installs a drive (you can verify the drive letter in Windows Explorer). Click on the Select digital camera drive button to tell Cammy which drive represents your digital camera. In the case your camera's drive doesn't show up in the drive list, you've probably been too fast after connecting your camera. Click on the Refresh button to update the drive list, then select your camera drive.
2. Select the base folder for your photos. The easiest way to work with Cammy is to keep a single folder which contains all of your photo folders. This way you need to set up the base folder only once, as Cammy will remember the settings the next time you start the program. You can either type the folder's full path or select it by clicking on the button with the folder symbol.
3. The photos you download from the camera are placed in the current photo folder, which is located in the base folder. You'll probably change this folder often, and give it an illustrative name like "Vacation2004", or you may click the Current Date button to create a folder with the current date in ISO form, e.g. 20040219 for February, 19th 2004.
4. The base path for the HTML gallery is available in the extended shareware version CammyPlus only.
5. Per default Create Backup from Photo Folder is activated. That means, a backup folder with the originals of your photos is created automatically. The backup folder is located in the base folder, too, and has the same name as the photo folder, but with a "_bak" postfix, e.g. "Vacation2004_bak". A click on Restore from Backup Folder quickly reconstructs the original photos in the photo folder, which can be very useful in case of editing errors.
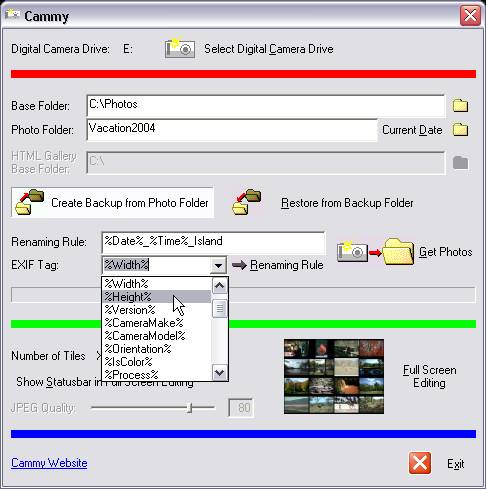
6. The files will be renamed according to the Renaming Rule, which defaults to %Date%_%Time%. The date and time placeholders will be filled in from the EXIF information your camera provides. If your camera does not support EXIF, leave the field Renaming Rule empty. As an alternative you can enter a name without EXIF tags; in this case the files will be renamed with a consecutive number. You may supplement any text that is valid for filenames, e.g. %Date%_%Time%_At_the_beach. You may select the desired EXIF tags from the list and add it to the Renaming Rule via -> Renaming Rule. Valid EXIF placeholders are:
%Version%
%CameraMake%
%CameraModel%
%Date%
%Time%
%Height%
%Width%"
%Orientation%
%IsColor%
%Process%
%FlashUsed%
%FocalLength%
%ExposureTime%
%ApertureFNumber%
%Distance%
%CCDWidth%
%ExposureBias%
%Whitebalance%
%MeteringMode%
%ExposureProgram%
%ISOequivalent%
%CompressionLevel%
%FocalplaneXRes%
%FocalplaneYRes%
%FocalplaneUnits%
%Xresolution%
%Yresolution%
%ResolutionUnit%
%Brightness%
When using EXIF placeholders, make sure that you don't mistype, and carefully respect the case.
7. As soon as you click Get Photos the photo transfer to your photo folder starts. The progress bar displays the percentage of the files downloaded. When the copy process finishes, a message box is displayed.
8. Beneath the green bar you can enter the number of thumbnail images to be displayed on the full screen thumbnail page. The default is 4 for both, X and Y, so you'll see 16 thumbnails per page. The higher the numbers you enter, the smaller the thumbnails get. If you select the Show Statusbar in Full Screen Editing toggle button, the path and filename of the current (highlighted) thumbnail is displayed at the bottom of the thumbnail page. Because the path display needs some space on the thumbnail page, the thumbnails become a little smaller.
7. In Cammy photo editing takes place in full screen because of the better overview. The thumbnails are usually clearly bigger than in comparable programs, so that you can recognize the pictures much better. Click on the Full Screen Editing button to start browsing the photos. The thumbnail page will appear full screen:
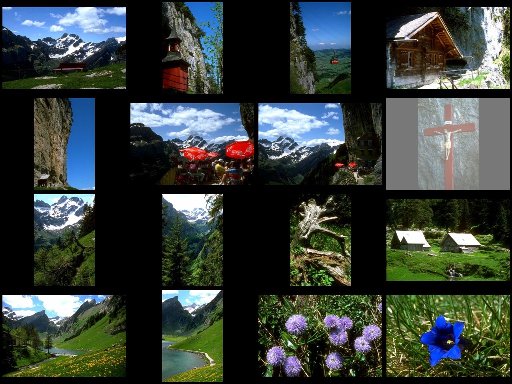
While moving the mouse across the thumbnails, the photo below the mouse cursor will be highlighted. Leaf through the thumbnail pages back and forth by pressing the PgUp or PgDn keys on the keyboard. You can easily switch back and forth between single photo view and thumbnail view by double clicking. You may leave the full screen views at any time by pressing the ESC key.

10. In both views, right-clicking the mouse displays the Image Operations dialog with its four tabs. The Basic tab is available in both, the freeware and the shareware versions Cammy and CammyPlus.
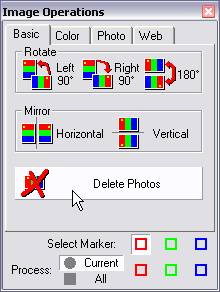
The Color, Photo and Web tabs are active in the CammyPlus shareware version only.
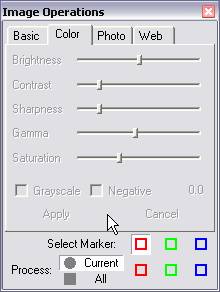
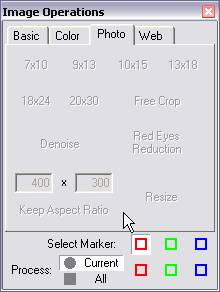
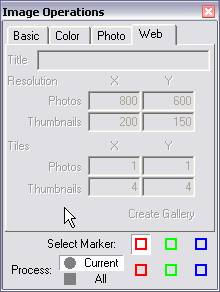
They allow for advanced photo editing, e.g. cropping to the correct aspect ratio for photo prints from photo labs. You may easily create HTML photo galleries as well.
11. To edit photos you can set markers, or you work with the current photo only, or with all photos at once. You can mark photos using one of three colors in order to apply image operations to multiple photos at once. To mark a photo with the current marker color, simply click on it, or press the Space bar on your keyboard. Select the marker by clicking it in the Select Marker row, or by pressing the R, G, or B keys for red, green, or blue, respectively.
12. You can either work with the current photo only, or with any combination of red, green, and blue marked photos at once. Select Current, All or a combination of red, green, and blue from the Process buttons.
13. Select the image operation you want to perform. On the Basic tab you may rotate, mirror, or delete the photo(s) you selected using the Process buttons. The rotate and mirror functions are realized as lossless JPEG transformations, thus you can perform them as often as you like without losing quality. All image operation on the Basic tab have an immediate effect on your photos.
12. Leave the Image Operations dialog and the full screen display by pressing ESC twice. You'll see the main dialog again. At the bottom you can click the link to visit the Cammy home page, or you may exit the application.